If you want to change the class or move multiple transactions to another account, where the QuickBooks Online Accountant saves your time, and because of that you do not need to edit them one at a time. In QuickBooks Online, you can only use the reclassify tool to make the same changes to multiple transactions at once. So, here we will discuss how to move or reclassify multiple transactions in QuickBooks Online Accountant.
When you choose Reclassify Transactions from the Accountant Tools menu in QuickBooks Online Accountant, then you can see that the Reclassify Transactions page appears. After that, you can use the reclassify transaction page without worrying about the company’s closing date.
Types of Transactions You Can Not Move
You can use the recursive tool for most types of transactions. Except that the tie for specific accounts and features:-
- You can make the modifiable class for invoices, sales receipts, checks, or bills with items (products or services) on them. However, you can not change the accounts.
- You can not make the modifiable payment account (both the bank or credit card) for business expenses.
- You can not make the modifiable account or class for inventory adjustments since they’re connected to your inventory shrinkage and asset accounts.
- You can make the modifiable expense account for billable expenses, but not the income account for the related income transactions.
- You can handle your payroll transactions in the Payroll menu.
Note:- Before you can move transactions to Accounts Receivable or Accounts payable, you need to have a customer or vendor associated with them. But it’s important to fill up, don’t leave these fields blank.
Other Recommended Articles:
QuickBooks Error 1334 – How to Fix It?
Set up and use multi currency in QuickBooks
Fix ‘Aborting Application: QuickBooks is Now Terminating’ Issue
Procedure to Reclassify Multiple Transactions in QuickBooks Online Accountant
Here below we will discuss the steps to reclassify multiple transactions in QuickBooks Online Accountant, check carefully and follow these steps:-
Steps to Reclassify by Location
Follow these given steps to use the Reclassify feature in QuickBooks Online Accountant to reclassify locations.
- First, you need to open your client’s QuickBooks Online company.
- After that click on the option of Settings, and then click on the option of Account and Settings.
- Click on the option of the Advanced tab.
- Then, go to the Categories section and then click on the option of Edit.
- Select Track locations option.
- Go to the Location label dropdown menu, and then click on the option of Location.
- And at the last, select the Save option.
Steps to Set Report Options
After the above step is completed then you can follow these given steps to create a rule to filter specific transactions that you need to reclassify by a certain date.
- First, you need to open your client’s QuickBooks Online company.
- After that, click on the option of the Accountant Tools (briefcase) icon, and then select the Report options.
- And at the last, you can set the date for when you get your report.
Steps to Reclassify and Move Transactions
When you completed the above details then you can use the reclassify tool to move transactions to similar accounts or change their class completely.
Note:- You are allowed to reclassify accounts, classes, and sales tax codes in bulk.
- First, you need to open your client’s QuickBooks Online company.
- After that, click on the option of Accountant Tools (briefcase) icon.
- Then, click on the option of Reclassify Transactions.
- Click on the option of Profit and Loss from the Account types drop-down menu to see income and expense accounts.
- Or the option to click on the option of the Balance Sheet to see your asset, liability, and equity accounts.

- Click on the option of the account from the Account list, with the transactions that you want to change.
- After that, you need to use these filters:-
- Type:- With this you can filter by transaction type.
- Class:- With the class you can filter by transactions under a Class or no class, and if it is not available, then turn on the class tracking.
- Customer or Vendor:- With the customer and vendor you can filter for a specific customer or vendor.
- You can modify this Filter by transactions that you can modify.
- Then, you can click on the option of Find Transactions.
- After that, choose the box for each transaction that you want to change.
- Then, click on the option of Reclassify.
- And after that, you can go to the drop-downs, and then click on the new account to move the transactions to, or a new class.
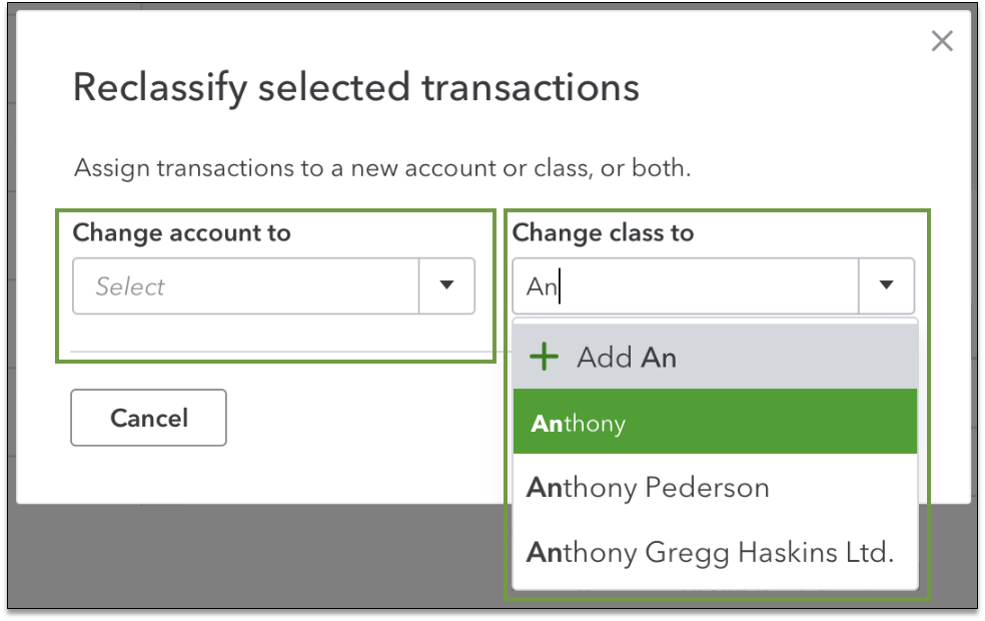
- And at last when you are ready, then click on the option of Apply.
If you can also use the reclassify tool for your personal transactions in QuickBooks Online Accountant, then you need to click on the Dashboard menu. And after that click on the option of the Accountant Tools (briefcase) icon and Reclassify Transactions.
Conclusion
We tried our best to provide information in this article, we hope you understood, and get the solution to how to reclassify multiple transactions in QuickBooks Online Accountant. Further in case, if you need any ProAdvisor support to shut out any kind of doubts regarding this article, then you can drop a call through our Accountwizy toll-free number +1-844-405-0904.
