Navigate to the vendors center and choose New vendor. Enter the contact details for the vendor and save it. If you have 10 or more companies, head over to the way to set up companies the usage of Excel phase of this article.
These five steps on how to set up vendors in QuickBooks Online are:
Other Recommended Articles:
How to Exclude Bank Transactions in QuickBooks Online
Using Tags & Groups in QuickBooks
QuickBooks Linux Database Server Manager
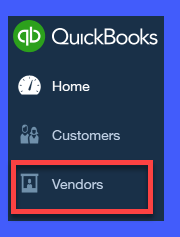
1. Navigate to the vendor center
To installation your carriers for your company files, navigate to the vendor center by clicking on companies on the left menu bar right below clients, as indicated below:
2. Create New dealer
Click on the blue New vendor button within the upper right-hand corner, as indicated below:

3. Enter vendor information
To set up a new vendor, you need to enter basic data consisting of a contact person, the business name, and remit to address. The email address of your contact, along with the payment phrases and the federal tax identification number, are also pertinent information to consist of.
Below is a sample supplier that we’re setting up for our fictitious organization, Paul’s Plumbing:
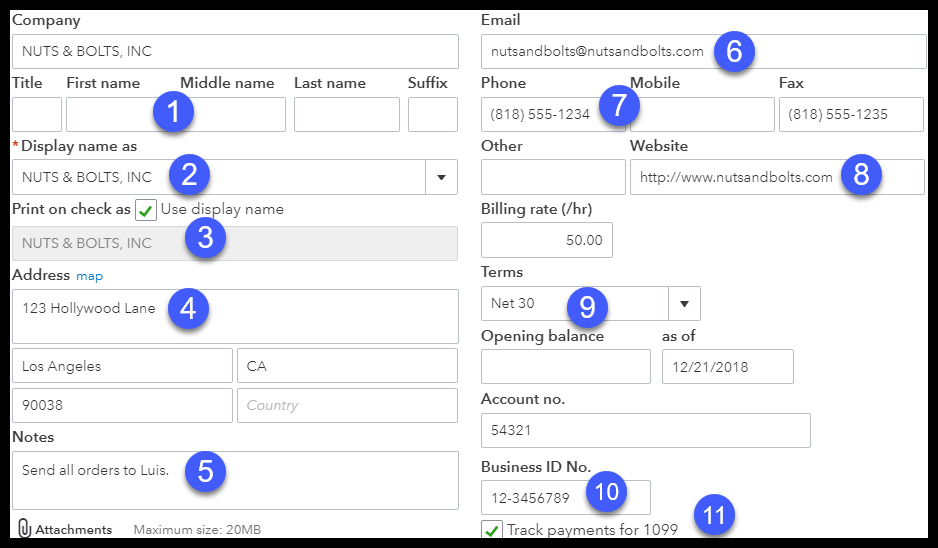
The fields that you need to complete, and evidence of how that data might be utilized by QuickBooks, are:
- First and Last Name– complete this for individual vendors; this information will appear on all bills and buy orders which you create.
- Display name as – This field will auto-populate based on the data entered within the vendor Name field. That is how your dealer will show up on your dealer listing in QuickBooks.
- Print on a check as – when you write checks and pay vendor payments, the payee information will come from here. If the payee isn’t like the vendor name, then you could make the essential adjustments right here.
- Address – This needs to be the address where you need to mail your fee to the vendor.
- Notes – enter any additional statistics right here that you would like to hold song of in your vendors (e.G., extra contact names or telephone numbers). These records is for inner purposes and could no longer be visible to your providers.
- Email – the e-mail address this is entered here can be used to send vendors to buy orders through email.
- Phone/mobile/Fax – input the touch phone numbers furnished by way of your providers.
- Website – enter your supplier’s website deal with for quick reference.
- Fee phrases – in the way to Setup prices lesson, we installation default price phrases (e.G., net 30) for all companies. In case you want to alternate the default price terms for any supplier, you can achieve this right here within the vendor profile.
- Business id No. – You need to request the tax identity or Social protection quantity from all providers given that that may be a key piece of statistics you may want for the 1099 tax shape. Whilst preparing 1099 bureaucracy, QuickBooks will take the tax identity information from right here. A phrase OF caution: if you do no longer have the tax id for a supplier, you’ll not be able to print a 1099 shape.
- Track bills for 1099 – Through marking this box, QuickBooks will music these companies and consist of them on a 1099 file. If the supplier is not integrated, you’re required to ship them a 1099 tax shape if you pay them $six hundred or greater in a calendar year.
Earlier than you issue the first fee to a 1099 seller, ask them to supply you with a finished W9 form. This form may have all of the key information which you need on the way to create a 1099 form.
4. Input other vendor data
Similarly to contact information, you can attach files, set billing fees, set up starting vendor balances, and assign account numbers to dealer providers in QuickBooks.
The four additional vendor information fields are attachments, billing rate, opening balance, or account number, as shown below:
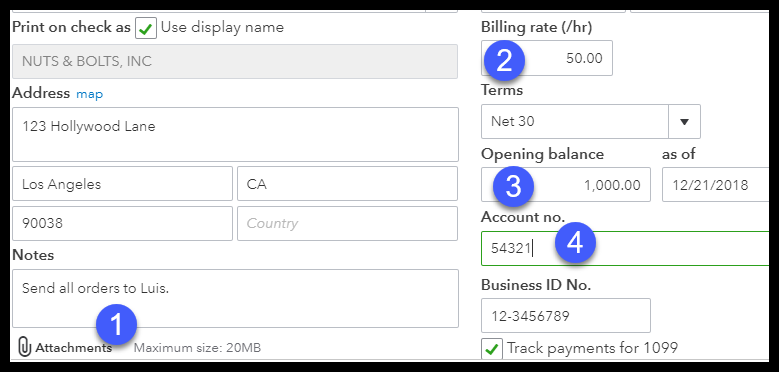
The fields that want to be finished, along with an explanation of how that information will be used by QuickBooks, are:
- Attachments – connect any files that you would like to preserve on the document for this dealer.
- Billing rate – enter the hourly or flat billing fee for this supplier for easy reference.
- Opening stability – This field may be used to enter outstanding balance which you have with a seller. For example, if you are changing from another bookkeeping device to QuickBooks and you’ve some outstanding bills, then you may input the whole super balance here while you set them up in QuickBooks.
- Account number – when you have an account number with your vendor, you may enter it here for clean reference.
5. Assessment vendor Set-Up
Now that you have finished the vendor setup, the vendor will appear in the vendor center as indicated under. You may review the facts to ensure it’s correct. If you want to make any modifications, absolutely click on the vendor’s name and make the essential edits.
