Today Accountwizy is here with a new article to enter billable expenses in QuickBooks Online. Here in this article, you will be guided in a proper way to enter billable expenses in QuickBooks Online. If you are interested to know the procedure then, connect with us, and read the blog till the end.
Generally, the billable expense is an expense that you incur on your client’s behalf when you do something for them. With the help of these features, you can easily record and track your business or company bills expenses, so that your customer can reimburse them, and also that time when they receive their invoices.
Note:- Expenses will be paid for, as well as billable box checked. If you want to mark the cost then you can enter the applicable percentage. The expense is normally recorded when you save your transaction, and a non-posting transaction is also called a billable expense.
Other Recommended Articles:
How to Record QuickBooks Credit Card Cashback Rewards
How To Categorize Credit Card Payments in QuickBooks?
QuickBooks Safe Mode (How to Open & Run It)
Steps to Enter Billable Expenses in QuickBooks Online
Here we have explained this process below for you in an easy step, on whose basis you can easily do this process. Read the left steps first and then follow the given steps one by one.
Step 1: Turn on Billable Expense
In the first, step, you need to record billable expenses and turn on billable expense tracking. Follow these given steps carefully, and complete this process:-
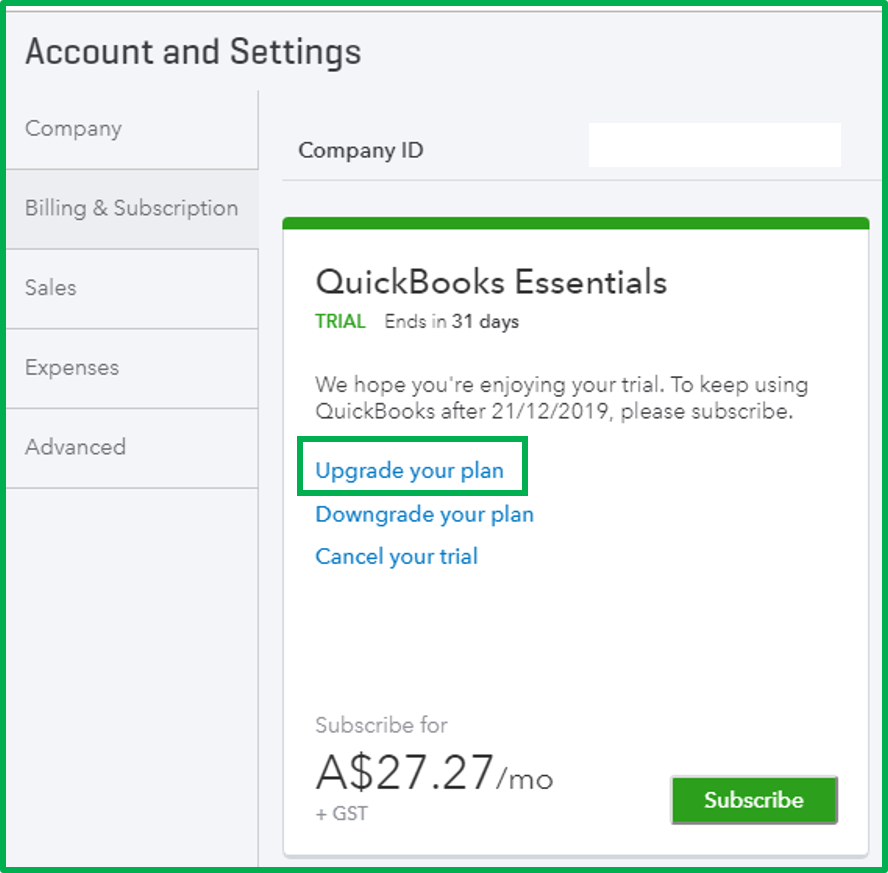
- First, you need to go to the Settings menu, and then click on the option of Account and Settings.
- Then, go to the Expenses tab.
- After that click on the option of edit from the Bills and expenses section.
- And then, you need to select the following options:-
- Show Items table on expense and purchase forms
- Track expenses and items by customer
- Make expenses and items billable
- You need to Set up the following options (Optional):-
- Markup rate
- Billable expense tracking
- Sales tax charge
- Bill payment terms
- At the last, click on the option of Save, and then Done.
Step 2: Enter a Billable Expense
In this step, you need to bill a customer for an expense, then you need to follow these given steps carefully:-.
- First, you need to click on the option of + New.
- Select the transaction (Bill, Expense, or Check) that you want to create.
- Choose the payee.
- Click on the expense account for the transaction in the Category column,.
- After that, you need to enter the description and amount of the expense, and then click on the option of the Billable checkbox.
- Click on the option of customers that you want to bill for this expense in the Customer column.
- After that, the above process completed, you need to enter the expenses or make sure the markup % (percent) is correct, and then select the Tax checkbox or also choose a tax agency if you want to charge tax (Optional).
- And, at the last process of this step is to click on the option of save and close.
When you are saving the expense transaction, then that time “Something’s not quite right”
When you start the process, and that time you see this error, and also when the income account isn’t linked to the expense account you choose. Then, follow these given below step, and fix them.
- First, you need to go to the Settings menu, and then click on the option of the Chart of Accounts.
- Click on the option of the small icon on the expense account, that locate under the Action column. And then, click on the option of Edit.
- Choose the Use for billable expenses checkbox.
- After that, choose the account that you want to link in the Income Account dropdown menu.
- And at the final step of this process, you need to click on the option of Save and Close.
Step 3: Add Billable Expenses to Invoices
In this step, you need to reimburse the cost of your expenses and link the billable expense to your customer’s invoice. And add billable expenses to the invoice, you need to follow these given below steps:-
- First, click on the + New option.
- After that, you need to click on the option of Invoice.
- Choose the customer, that you created a billable expense for in the Customer dropdown menu. And this option opens the Add to invoice window.
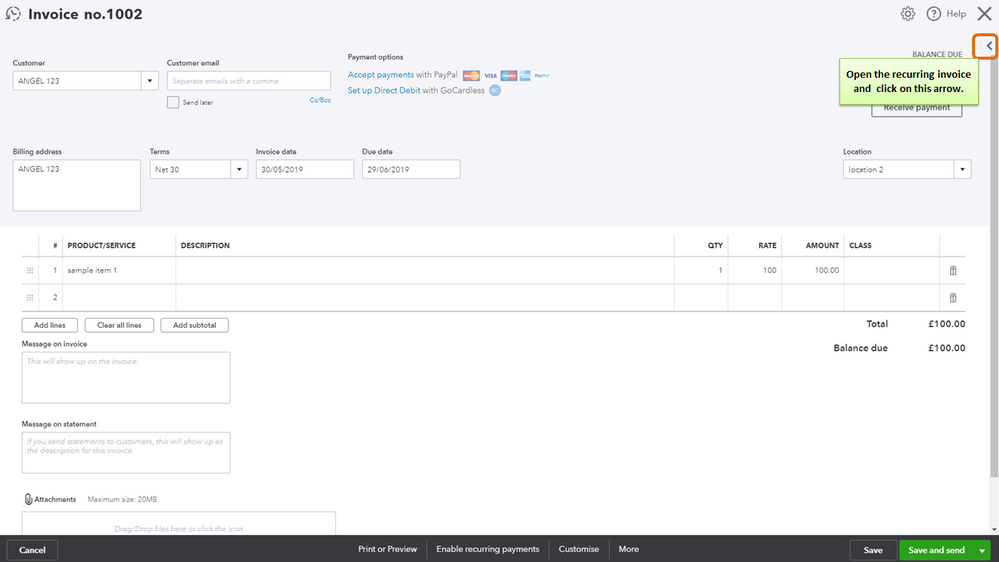
- Click on the option of Add on the billable expense, that you want to charge to your customer.
- And at the final step of this process, you need to click on the option of Save and Close.
Final Note
We hope that the details mentioned above are good for you and it will prove to be informative for you and hope you will enjoy the details. You must have understood how to solve how to enter billable expenses in QuickBooks Online from the details mentioned above. But if you still have any issues or any problem regarding this topic, then that time you can get our ProAdvisor support at any time and anywhere.
