QuickBooks scheduled reports are the new features of the QuickBooks software. This feature is available on the QuickBooks desktop 2017 or later version of QuickBooks. It allows sending reports on regular and recurring scheduled times. If you send similar reports on a daily, weekly, monthly, or quarterly basis, you can easily set up your scheduled reports to automate this task. And you can select the time and frequency at your convenience to send your scheduled report. You can also send multiple reports to that scheduled time.
What is the Requirement for QuickBooks Scheduled reports?
Before setting the procedure for the scheduled reports, Generally available requirements. Which is very important to set these requirements. Those requirements are:-
- When you set up the scheduled report on your system then your system should not be running and in sleep or hibernate mode.
- Before the set up scheduled reports, check the user account control is turned off. Information:- Turning off user account control can a security risk to your system.
- QuickBooks must be updated at the latest version.
- Your QuickBooks company’s file should be in single-user mode.
Other Recommended Articles:
How to Fix Overflow Error in QuickBooks Desktop
How to Create QuickBooks Payroll Summary Report
How to Set Up QuickBooks Online Expenses
How to Create & Set up The QB Scheduled Reports?
If you want to create scheduled reports and also want to set up these reports, then you can learn here through this blog.
For this you need to follow these given procedures then you can easily create and set up your QB scheduled reports.
Follow these steps to create a new scheduled report:
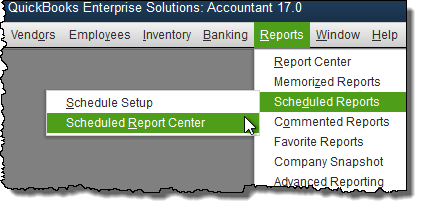
- First of all, Go to the QuickBooks Reports menu, then select the Scheduled Reports and click on it, After that click on the Schedule Setup option.
- After that select the reports that you want to send.
-
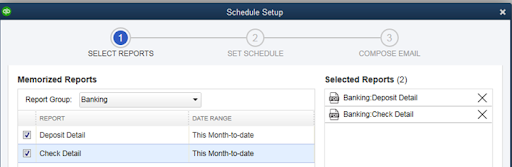
- You can also choose more than one report to send on the same schedule. After completely selected reports, then click on the Next button.
- NOTES:-You can only schedule a time for missed reports.
Steps: To Set up a report schedule
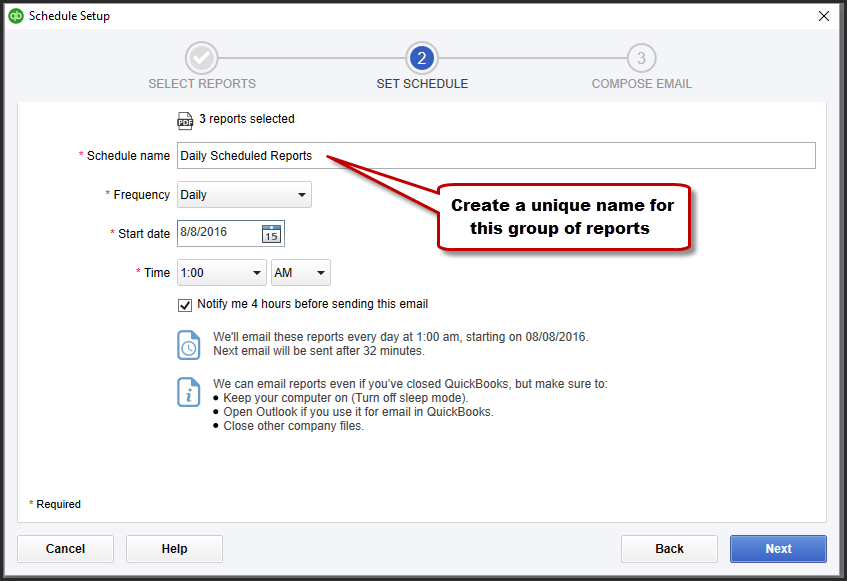
- In this section, Enter the new schedule name, That name must be unique.
- Then Go to the frequency section box and select through the given drop-down to set how you want to send the report.
- Then Go to the Start Date box and click on the calendar icon and select dates yourself.
- After that Go to the Timebox and enter the time.
- After filling all the boxes successfully, then Press on the Next button.
- NOTE:- you can choose to notify QuickBooks 4 hours before sending the report.
Steps: To Compose scheduled reports email
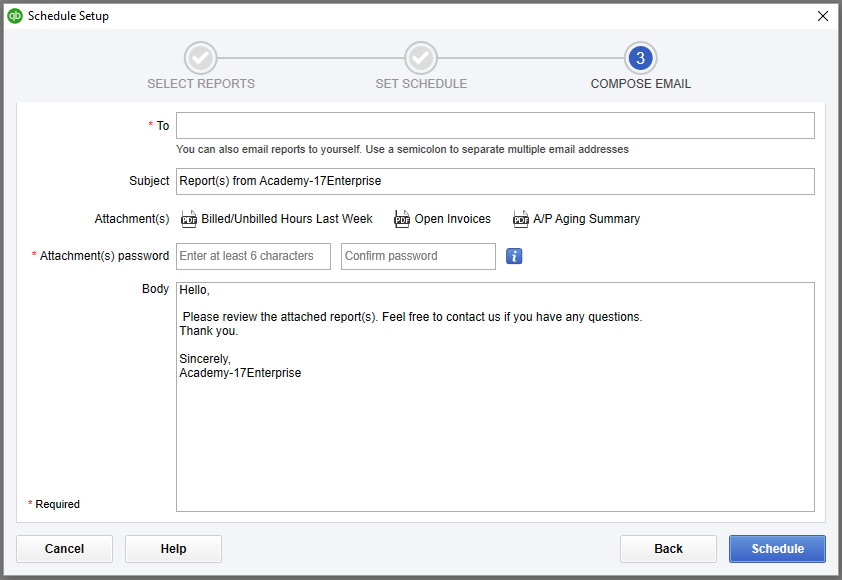
- In this section Enter the email address you want to send the reports. You can also send the scheduled reports in several email addresses, For that, the only semicolon has to be used.
- To complete the set-up process, you just need to assign a password for the report attachment. Do not enter passwords in the subject or body field of the email for the security.
- After that Press the Schedule button to finish this procedure.
- If you want to check your saved scheduled reports. Then this report is only available at the Scheduled Report Center tab.
- First of all, Go to the QuickBooks Reports menu, and select the Scheduled Reports and click on it, After that click on the Scheduled report center option.
- Then you can check here your saving scheduled.
To Edit Or Delete The QuickBooks Scheduled Reports
you are interested to edit or delete the scheduled reports. Then follow the given below process:-
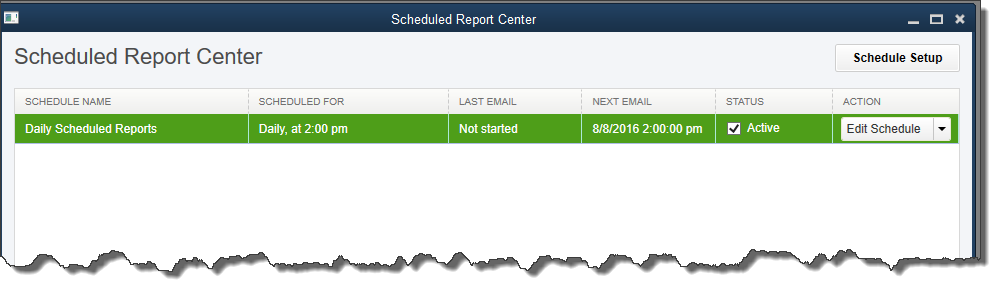
- First of all, Go to the QuickBooks Reports menu, then select the Scheduled Reports and click on it, After that click on the Scheduled report center option.
- After opening the Scheduled Report Center tab, Go to the edit Schedule option then choose the Edit or Delete option through the given drop-down and click on it.
- If you want to deactivate the QB scheduled reports, then remove the checkmark in the active box. This will maintain the settings of a scheduled report but It will stop it from running until it becomes active again.
