In today’s topic, we will know ‘How to create journal entries in QuickBooks Desktop?’. For those who are new to QuickBooks Desktop and need help to create journal entries in QuickBooks Desktop, this blog will be very helpful for them. And if you are a QuickBooks Online user, and also searching solution for the same topic but in QuickBooks Online then go for the Journal entry in QuickBooks Online.
Before going to the blog, it will be good know about the journal entry in a few sentences. Journal Entry is a record of transactions that shows the credit and debit balance of the company. This is a very important part of business accounting and you should do it only if you understand accounting or you take the help of your accounting.
Other Recommended Articles:
Tips to Troubleshoot Multi-User issues in QuickBooks for Mac
Guide To Resolve The QuickBooks Error Code C=51
Guide to Enter or Edit the QuickBooks Payroll Service key
Procedure to Create Journal Entries in QuickBooks Desktop
Before proceed to create a journal entry in QuickBooks Desktop, you have to follow some instructions, which are mentioned in the below:
- Enter then debits and credits details manually as you do in traditional accounting systems.
- Next transfer money between income and expense accounts.
- Then transfer money from an asset, liability, or equity account to an income or expense account
Now you can add a journal entry in QuickBooks Desktop, let’s know how to do it:
How to Add a Journal Entries in QuickBooks Desktop
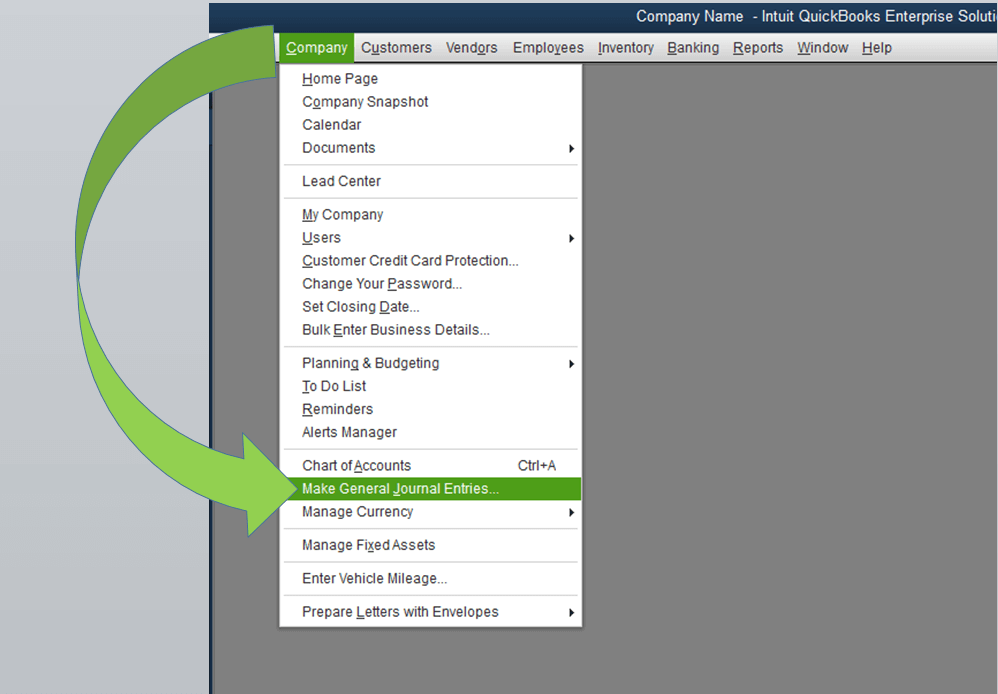
If you want to add a Journal entry, then follow these given steps:-
- Open the Company menu and click Make General Journal Entries.
- Now feed the details in the fields to create your journal entry. When you are done then your debits and your credits should be equal.
- Choose Save & Close.
If you face any issues in creating journal entries then you can contact QuickBooks Error Support for assistance.
How to Edit a Journal Entries in QuickBooks Desktop
If you occur any problem and need to edit QuickBooks desktop journal entry. Here are the steps to what to do to edit the journal entry:
- Firstly, go to the Company menu and then, select the option of Make General Journal Entries.
- After that, select the option of Find and enter the Name, Date, Entry Number, or Amount and then, selects Find option.
- Then, double-click on the journal entry, and then make your updates. When you are done with this process, then select Save & Close option.
- To record the changes, and then select the option of Yes.
How to Delete a Journal Entries in QuickBooks Desktop
Delete the journal entry by following the below procedure:
- In this process first, you go to the Company menu and then select the given option of Make General Journal Entries.
- Then, select the option of “Find” and then, enter the Name, Date, Entry Number, or Amount then just select the “Find” option.
- Then, Double-click on the journal entry, and then select the given option of Delete or Void, then click on OK.
- Then, select the option of “Save & Close”.
How to Send Journal Entries in QuickBooks Desktop
Here this process is to send journal entries in QuickBooks Desktop, in the case of exiting journal entry. You can follow these steps to if you have existing journal entries.
- Launch QuickBooks and go for the ‘Accountant’ option.
- After that, Select the Send general journal entries.
- In the next step separate the file of journal entries by selecting the date from the Date drop-down.
- If you want to edit journal entries before sending then follow the given steps in the below (Optional):
- Go to the account column, and from the under click on the given link.
- Then update the entry, in the make general journal entries windows.
- After that, save and close it.
- If you need to send the journal entries to the recipient, follow the below steps:
- Go for the email as an attachment to send the journal entries simultaneously.
- After that, click on the ‘Save as File’ to save the journal entries.
- If you want to edit journal entries before sending then follow the given steps in the below (Optional):
Congratulation you have sent journal entries in QuickBooks Desktop successfully..
Conclusion
So this was the blog, where you can get the knowledge to create, add, edit and delete journal entries in QuickBooks Desktop. We hope, this blog will help you to create journal entries in QuickBooks Desktop. Still, if you are facing any kind of issue regarding this blog, then you can get our Accountwizy ProAdvisor support through our toll-free number +1-855-525-4247 at any time and anywhere.
