Are you using QuickBooks Desktop for the first time? Then it is sure that you need help to set up QuickBooks for the first time. Don’t worry, here in this article you can get the complete guide to set up the QuickBooks successfully. So let’s, read this article till the end of the complete process.
7 Simple Steps to Set Up QuickBooks for the First Time Desktop
There are different steps to set up QuickBooks Desktop for the first time :
Step 1. Register for QuickBooks
Register for QuickBooks Desktop on QuickBooks official website. There are different packages that you can choose after taking a free trial. Different packages are :
- Simple Start Plan – $5/month : It includes creating invoices, getting estimates and downloading your Bank transactions.
- Essential Plan – $10/month : It includes all the features which are in Simple Start Plan with the access to manage and pay bills and offers multi-user support.
- Plus Plan – $21/month : It includes all the features and access to track inventory, prepare and print 1099’s.
All the above features are available for a free 30 days trial. You just have to enter all your details and start your free trial.
Step 2. Customize your Company preferences and Account Settings
QuickBooks Desktop gives you the option to customize your men and account settings.
- There is an option of the to-do list on QuickBooks Desktop.
- When you log into QuickBooks Desktop for the first time, you will find the tutorials which will help you set up your new account.
- Now set your company preferences which will help you move forward with the QuickBooks.
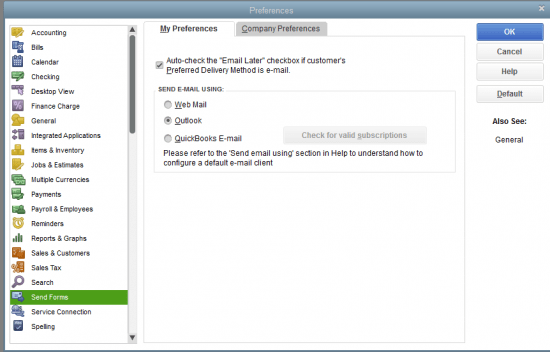
- After that click on “Company Tab” and select “Preferences”. Enter your Company’s Contact details & change the account setting as you like. This setting may include credit card payment, time tracking, etc.
Step 3 . Import Data to QuickBooks
QuickBooks Desktop allows you to import business data to your QuickBooks Desktop. It can import data from Excel sheet.
To Import your business data to QuickBooks, you would be required to click on “Company Tab” and select “More” and “Import Data” from the Drop Down Menu.
- There are various different options for you to upload the file. You choose any of them as per your choice. Uploading in the new version is easy compared to the previous version.
- The Business data you can import are customer or vendor data, products & services from excel, Transaction from your bank and other data also.
- There are some errors also which you may face while importing but they can easily be solved.
- While doing this you will see that QuickBooks makes everything over categorize some of your business but it will help you in the future.
Step 4. Sync your QuickBooks with your Bank Account
After following the above steps, To set up QuickBooks Desktop, you have to sync your QuickBooks with your bank account. To do so follow the below steps :
- Click on the “Banking Tab” on top of your screen, it will automatically connect your QuickBooks with your Bank account.
- Click on the “Download transaction”.
- Now a pop up window comes in which you have to fill all the banking details. You can use your Online Banking details also.
- After this you bank account will be synced to your QuickBooks
- Now you can finally attach “Customer and Vendor names” to each transaction.
- You can also keep track of your debit and credit card payment.
Step 5. Syncing Business Credit Card
Follow these steps to sync your business Credit card for credit card payment in QuickBooks
- Now it is time to sync your credit card to QuickBooks, for this click on “Banking Tab” on the top menu bar.
- Select “More” and then Register it.
- Now enter your credit card information and choose a credit card from the options.
- It will launch the setup that will help you to sync your credit card.
- After syncing your credit card, make sure your information is shown in QuickBooks.
Step 6. Customizing your Invoices
If you want to grow your company then you need good-looking and well-maintained invoices. It will attract customers and make a good impact on them. This can be done by customizing your QuickBooks invoices with your company logo and branding.
- QuickBooks gives you the option where you can customize the invoice. You can change everything from color to font in the invoice. But this option is available only to the QuickBooks Plus Subscribers. If you want to use this option then you need to upgrade.
- To do so, click on the “Customer Tab” and then Select “Create Invoices”.
- Choose the template by your own wish or make your own. You can also do some changes by clicking “formatting tab” and then clicking on “Customize Date layout”.
- “Use Logo Checkbox” to check whether your logo is right or not.
Step 7. Import your Contacts
QuickBooks Desktop also provides the option to import your contacts. Follow the below steps to import your contacts
- First Click on “Company”
- Click on “More”
- Then Click on “Import data”.
- Select the “Customer or Vendors”
- The data of Customers or vendors can be uploaded in excel or CSV file.
- After this, it will automatically extract data.
- While copying the data QuickBooks can make mistakes so please make sure to review your data after importing it.
Other Recommended Articles:
QuickBooks Error 80070057 (The Parameter is Incorrect)
QuickBooks Auto Data Recovery To Recover Lost Data
Which QuickBooks Version is Right for Small Business
Key Points to remember for First-time Users.
If you are using QuickBooks Desktop for the first time then make sure to follow the below points before setting up QuickBooks Desktop.
- Separate Businesses: QuickBooks allows you to sync your accounts with it but it would be better if you separate your business transaction from your personal transactions.
- Avoid using invoices and estimates: it is advised to the first-time user that they should avoid using invoices and estimates on QB desktop or any other variant. First, they should be familiar with the software like how it works, how the transactions are done. After that, you can use it.
- Experts to help: You can get help from the QuickBooks Experts as per your Zip code or Postal code.
All of the above tips help you to set up QuickBooks Desktop for the first time. After that, you can use it and make your business grow. Still, if you need help to set up the QuickBooks then you can get our QuickBooks expert support for the easy installation and set up.
