If you want to set up a new company file in QuickBooks then you are at the right place. This whole article is about how to create and set up a new company file in QuickBooks.
QuickBooks accounting software allows saving more than one company files for more than one business. There must be a separate company file is a must for every business.
When you set up a new company file then it is not compulsory to delete or close the last file. Setting up a new file provides more security to protect the data from accidental losses. It also helps you to organize your data by deleting the cache and removing unwanted items.
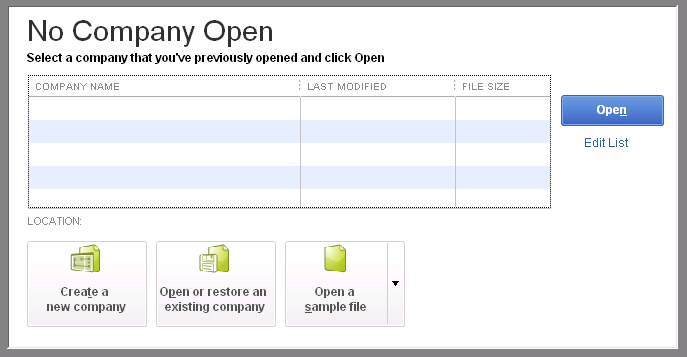
If You are new to the software then it would be good for you to use the sample company file. Because when you use it you will get used to the software and you can experiment too if you want to. After that, you should start the real thing.
Other Recommended Articles:
QuickBooks Desktop Premier Plus Subscription 2022: What’s New in It
How to Move Fixed Asset Data to New QuickBooks
QuickBooks Online for Mac App (The Free Download & Installation Process)
How to Create a New QuickBooks Company File
Now we will learn how to set up a new company file in QuickBooks but before that, you have to keep one thing in mind i.e. before creating a new company file you have to delete or rename the old file which has the same name as the new company file because if you use the exact same of the new company file then file will override the old one and the data will be lost. Now follow the below steps to set up a new company file in QuickBooks.
- Open the QuickBooks Desktop
- On the No Company window, you need to click on the “Create n New Company”.
- Now you have the two options.
- Express Start: It is for the user who wants to start it instantly. The user will have to enter only the business name, industry, and business type and you can enter these details later on too.
- Open QuickBooks Desktop.
- Click on “Create a new Company”.
- Now click on the “Express Start”.
- After that fill in all the required information
- Now Click on the new create company tab.
- Now you can start creating the charts of accounts, customers, and services or you can select “start working” to work later on.
- Express Start: It is for the user who wants to start it instantly. The user will have to enter only the business name, industry, and business type and you can enter these details later on too.
Note : Click on the “Help me Choose”. By clicking on this option you will see a description for every business type and the charts of accounts that QuickBooks will create for you per industry.
- Detailed Start: It is the recommended option that the user should select. If the user wants to do a complete setup then the user has to enter all the required information from the start.
- In this, the user has to open QuickBooks Desktop.
- Now click on the “create a new company” on the no company window.
- Now click on the detailed start.
- After that fill in all the details on the easy step interview screen and click on next.
- After that select the industry and again click on Next
- Now identify the Business entity and click on Next.
- Now you have to select the fiscal year for which you want to create a company file and click on Next.
- After this, you need to set up the QuickBooks Admin password and click on the Next
- Select the location and click on Save.
- Now you can customize the QuickBooks or you can do it later.
- After picking up any of the above options, you have to follow the on screen instruction to complete the setup.
Steps to Create a New Company File in QuickBooks Pro & Premier
If you want to make a new file in QuickBooks Pro or Premier then you have to follow the below steps.
- Firstly move the file menu and opt for the “utilities” option.
- Click on “Condense data”
- Now Rebuild all the outstanding balances in the accounts receivable either by recreating individual invoices or you can also make the balance forward invoice for a lump sum customer balance.
- You have to create all vendor balances along with the enter bill option in the vendor menu.
- Now the bills will be directly charged to the un-categorized expense account, as opposed to an individual expense.
- Payroll users and QuickBooks Online banking users cannot avail of this feature.
Now you have to follow some more steps
- Select File and new company option.
- Select the start interview option in the easy step interview window
- Now follow the on-screen instruction and enter the information for the new company file.
Wrapping Up
Creating a company file in QuickBooks is one of the easy processes. You can create it in any of the QuickBooks versions. Make sure to select the Detailed Start option because it is a recommended option. All the above steps are easy to do and you can follow them easily and set up a new company file in QuickBooks. After following the above steps if you are still facing some error then contact our QuickBooks experts to get an effective solution to your issue.
