You know that to establish whether your business is making or losing money you can run a Profit and Loss report. However, what should you do if you want to break down the data even more? Such as, having the ability to determine if the individual jobs you do for your customers and all their related income and cost are profitable. So here is today’s topic we will discuss ‘How to set up and create projects in QuickBooks online?’.
This sort of understanding can have a huge impact on your future business decisions when it comes to your product and service pricing and your employee costs and expenses. It can also tell you whether or not you should do specific jobs.
If you happen to be using QuickBooks Plus or Advanced, you can utilize their Project tools to calculate profitability. All you have to do is assign all relevant sales, time, and expenses to the project and QuickBooks will do the rest for you.
Other Recommended Articles:
How To Fix QuickBooks Error 1712 While Installing QuickBooks
Fix QuickBooks Error 6000
QuickBooks tls 1.2 – A Way To Solve
Steps to Set Up and Create Projects in QuickBooks Online
Here we will discuss the steps to how to set up and create projects in QuickBooks Online. So, check the given steps and follow it:-
Step 1: Turn on Projects
Follow these given steps if you have not already, turn on the Projects feature:-
- Go to the Settings option, and then click on the option of Account and Settings.
- Click on the option of the Advanced tab.
- After that, you need to find the Projects section and then click on the option of Edit to expand it.
- Then, choose to Organize all job-related activities in one place checkbox.
- And in the end, you need to click on the option of Save and close your settings.
When you have to complete all the steps then the Projects menu now appears in the main navigation bar.
Step 2: Create Your First Project
- First, you can click on the Projects menu.
- After that, click on the option of the New Project.
- Then, you need to give your project a memorable name.
- Choose the customer that you are working for from the drop-down menu.
- After that, add any notes or details about the project.
- And at the last, you can click on the option of Save.
When you completed the above steps then you will see your list of projects grow as your business takes on more work.
Step 3: Add Project Income and Expenses
In this ste[ you can now create your first project, and then start adding income and expenses. You need to add transactions to projects that won’t change how they are categorized or affect your accounts. You are only tagging them in your income so you can track specific project income and expenses.
- First, you can open your project.
- After that, click on the option of Add to project to create a brand new transaction.
- And at the last, you can click on the Invoice, Receive Payment, Expense, Estimate, Purchase Order, Bill, or Time option.
And when complete all processes, and when you select Add to project option, then you will automatically tag new items to projects.
The time option lets you record the same day of work by one of your workers. If you want to add a weekly timesheet to a project, there are some additional steps. Begin with step 5 of “Track income, cost, and profitability by the project” to calculate your hourly time costs. Then add your timesheet.
If you can use the TSheets to track your employees’ time, then you can import tracked time directly into weekly timesheets.
When are you working on an estimate?
Add project estimates before converting to your client’s invoice. You can also use progress invoices to create multiple invoices from a single estimate. That way, instead of initially asking for full payment, you can invoice for partial payment throughout the project. This is a good option if you charge a fixed fee from customers.
Step 4: Add Existing Expenses and Timesheets
If you can also tag the expenses and timesheets that are billable or nonbillable, then you have to create the outside of the Projects menu. Follow these given steps:-
Add Existing Expenses to Projects:-
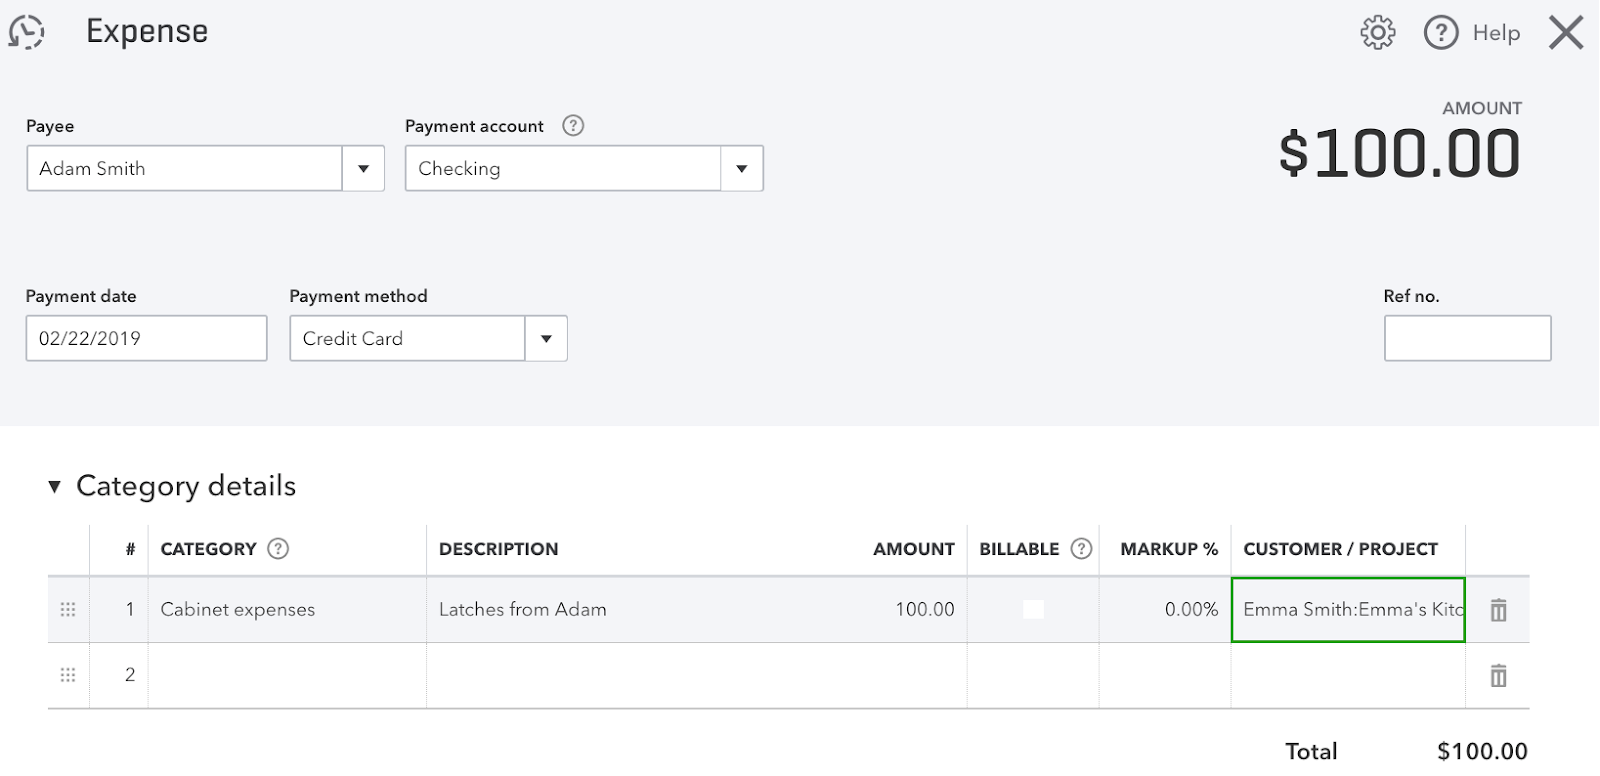
- First, you need to go to the Expenses menu.
- And then find and open the transaction option.
- After that, click on the project from the Customer or Project drop-down menu.
- You can do this for each expense item you want to tag.
- And this is not the same as the payee for the expense.
- At the last, you can click on the option of Save and Close.
Add Existing Timesheets (Billable or Nonbillable):-
- Here, in this step, first, you need to go to the Sales menu.
- After that, click on the option of Type column to sort the list.
- And then, find and open the timesheet.
- After that, click on the option of the project from the Customer or Project drop-down menu.
- Then, you can do this for each employee’s time that you want to tag.
- And at the last, click on the option of Save and Close.
Step 5: Add Existing Invoices and Estimates
With the help of this step you can easily create company new invoices for a project, but do some extra effort in adding existing invoices. The best time to add existing invoices to projects is before they pay. If you add a paid invoice to a project, the invoice will be separated from the attached payment. It will also change the status of the invoice to unpaid. To avoid accidentally charging customers twice, you must follow the steps to reconnect payments.
We do not recommend adding multiple transactions, billable expenses, or invoices associated with timesheets. If you add a linked invoice to a project, only the invoice is added. You must add transactions linked to the project and link them to the invoice.

Here, you can add the existing projections to projects until you convert them into invoices.
Step 6: Track Profitability
In this step, you will see important cost and profitability information (“Job Cost“) on each project page which will help you
Step 7: Turn Off Projects
In this step, you need to be a master admin to turn off the Projects feature. Follow the given steps:-
- Click on the Settings option and then select the Account and Settings option.
- After that, go to the Advanced tab option.
- Then, you need to find the Projects section and then click on the option of Edit to expand it.
- And after that, you can uncheck the Organize all job-related activity in one place checkbox.
- And at the end, you can click on the option of Save and then select the Done option.
Conclusion
In this blog, we can discuss how to set up and create projects in QuickBooks online and hope this article provides you with the solution. If you follow these steps carefully, then you will surely you can set up and create projects in QuickBooks online. If you still have any problems or any query in which you need our support then feel free to contact us at our Accountwizy ProAdvisor, and the toll-free number +1-844-405-0904.
