Today, Accountwizy with a new article to upgrade QuickBooks Enterprise From QuickBooks Desktop Pro/Premier. This is an important topic for all QuickBooks Desktop users, so if you are one of them read this article, and enhance your knowledge by upgrading the QuickBooks Enterprise.
Procedure to Upgrade QuickBooks Enterprise from QuickBooks Desktop Pro/Premier
Complete this procedure with some simple steps. Here we have completed the procedure in just 5 simple steps. And to make the procedure more simple for you, we have described all the steps simply. Now let’s start the procedure:
Step 1: Check the Network Connection
The first step is to prepare and check the network connection. Let’s check, and set up the network connection.
Network Options
There are different network options, showing workstations and servers with different install options. You can choose any one of them according to your all requirements for your company.
| Network Option | |
|---|---|
| Central Server | The QuickBooks database server manager will install it on the central server. And the central server also stores the company file. After that, install the enterprise on each workstation so that they can access the company file over the network. |
| Peer-to-peer network | In the peer-to-peer network, one workstation can store the company file. And all the remaining workstations use the same enterprise version to access the company file over the network. |
| Remote Desktop Services | Enterprise is installed on a central server that stores the company file, by using the Remote Desktop services. And if you access enterprise remotely then, you did not need to install on workstations. |
Test the Network Bandwidth
Test the network bandwidth, if you are using a multi-user environment. And check the firewall and AV settings, if you are using a single-user environment.
- First, you should choose a large data file for testing, and the testing file size should be in megabytes (MB).
- In the next step, copy the test file from a network location to the computer.
- It will take a few second to copy
- Then determine the following bandwidth by following the below calculation:
- File Size (in MB)x 8/copy time
Step 2: Install QuickBooks Desktop Enterprise on Server
Install QuickBooks Desktop Enterprise on the Server
To install the QuickBooks Desktop Enterprise on the Server follow the below process:
- If you are running any kind of program in your system then, close all the running programs, including the anti-virus programs.
- Open the downloaded file by double-clicking on it.
- Then follow the onscreen instructions, and get into the ‘Choose Installation Type’.
- Select the ‘Express’ tab, to let the installer make the best selection. Or you can choose the ‘Custom and Network’ option to customize the install and location.
- After that, you will get three options to choose. You have to choose any one of them:
- I’ll be using QuickBooks on this computer, but the company file will be located on a different computer.
- I’ll be using QuickBooks on this computer and storing our company file here so it can be shared over our network.
- I will not be using QuickBooks on this computer, but I’ll be storing our company file on it so the file can be shared over our network.
- Now follow the onscreen instructions until the install process is complete.
- And configure the database server manager by launching the QuickBooks database server manager tool.
Install QuickBooks Desktop Enterprise Server Manager
If you are a Linux user and want to know the procedure to install QuickBooks Desktop Enterprise manager the go for the Linux database server manager. You can get all the details on it.
Configure Database Server Manager
After installing QuickBooks Enterprise, you need to set up the QuickBooks Desktop server manager. Because, after completing the setup process the users can access the company files stored on the server. Always remember that this process must be done in the server system, where the company files are stored.
This will make you easy to see the status of the service, check for updates, and you can see which users are working in the company file. Now open the QuickBooks database server manager, and check all the facts are true or not. Follow the below steps to open the server manager.
- First of all, go to the Start button of the windows, and click on it.
- After that, you can see the option of ‘Programs’, just click on it, and then select the QuickBooks option.
- And at the last, click the QuickBooks Database server manager option to open it.
- Now your database server manager tool is open.
Scan QuickBooks Company Files
You need to scan all the QuickBooks company files, which are saved in the server to allow access to other QuickBooks users. Now follow the procedure to scan all the folders.
- Open database server manager, and select the ‘Scan Folders’ tab.
- After that, click the ‘Add Folder’ option, and choose the folder which contains the company files.
- Go to the ‘Folders That Contain Company Files’ section, to choose the see the folders.
- If in case, you are not sure, where you store Enterprise company files, then click the ‘Scan’ option to search the entire hard drive.
Point to Remember: Repeat the scanning process, if you create a new company file or if you move your company file to a new location.
Monitor the Hard Drives
The database server manager monitors any selected folders or drives for company files, which you have to add, remove, or renamed on the server. It allows the other systems to access them. Now follow the below procedure to monitor the computer drives.
- Go to the ‘Monitored Drives’ tab.
- And choose the local drive that you want to monitor.
Step 3: Set Up Sharing
You need to provide access to the company file, install enterprise on all workstations, set up multi-user hosting to complete the setup sharing.
Provide Access to Company Files
At first, ensure that all users have read/write access, and create/delete rights to the directory where the files are saved. And also ensure about the sharing folders and providing access from the network administrator.
Install Enterprise on all Workstations
Follow the below procedure to install enterprise on all workstations:
- If you are running any program, then first of all, close all of them, including the anti-virus programs.
- Open the downloaded file by double-clicking on it.
- After that, follow the onscreen instructions until you reach the ‘Choose installation type’ option.
- Go to the ‘Express’ tab to let the installer make the best choice, or choose the ‘Custom and Network’ option to customize the install and location.
- Now choose one of the options which way you should choose to install QuickBooks.
- I’ll be using QuickBooks on this computer, but the company file will be located on a different computer.
- I’ll be using QuickBooks on this computer and storing our company file here so it can be shared over our network.
- I will not be using QuickBooks on this computer, but I’ll be storing our company file on it so the file can be shared over our network.
- Follow the onscreen instructions, and complete the install process.
Set up the Multi-User Hosting
If you want to use multi-user, then remember that only one computer can host multi-user access.
And if you installed the QuickBooks database server manager on a file server recently then, you need not enable the multi-user hosting on the server. And ensure that, all user workstations have multi-user hosting disabled.
Step 4: Convert Data from Pro/Premier to Enterprise
It is a very important step, so always remember that, before converting any kind of data in QuickBooks, always create a backup of the file. You will not be able to read and use the file after converting the company file from QuickBooks Pro/Premier to QuickBooks Desktop Enterprise. So first, you need to create the backup of the company file and update the company file.
Create Back Up of the Company File
- Select the ‘Create Backup’ option from the ‘File’ menu.
- And choose a safe location to store the backup file data.
Update Company File
Follow the procedure to update the company file:
- The first step is to open the QuickBooks Desktop Enterprise, and then open the company file.
- Type the administrator password, and click the ‘Ok’ option.
- After that, choose the ‘I understand that my company file will be updated to this new version of QuickBooks’ checkbox, and click the ‘Update Now’ option.
- Now click the ‘Ok’ option to start the data back up, and follow the onscreen instructions to back up company files.
- Then click the ‘Yes’ option, when it will prompt to confirm that you want to update the file.
If in case, you face the update problem
- If you facing the problem in QuickBooks Desktop Enterprise:
- First of all, go to the File menu, and select the Utilities option, and then click on the ‘Restore Backup for Earlier QuickBooks version.
- If you facing the problem in the Previous Version of QuickBooks
- Select the ‘Open or Restore Company’ option from the ‘File’ menu.
- And after that, select the ‘Open a company file’ option, and open the restored file.
- After that, go to the ‘Utilities’ section of the ‘File’ menu, and click on the ‘Rebuild Data’ option.
- Follow the onscreen instructions, and enter a new file name.
- After the complete rebuild process, exit the previous version of QuickBooks.
- Again go to the Desktop enterprise, and select the ‘Open or restore company’ option from the file menu.
- Select the new rebuilt company file, and click on the ‘Ok’ option.
Step 5: Configure the Network & Server Settings
Configure User Permission, and Lists
- You can manage use permission according to your need and can grant permission to each and every user, and also can manage 30 users simultaneously.
- And the existing list will transition to enterprise.
Register the Enterprise Software
QuickBooks allows you to do the registration of your enterprise software. Don’t skip this step, it can give you more benefits to run the QuickBooks Desktop enterprise. Here is the procedure, how to register QuickBooks Desktop enterprise:
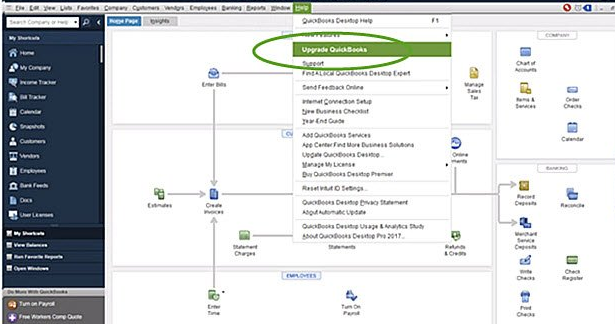
- Open the QuickBooks Desktop Enterprise, and go for the ‘Help’ menu.
- Select the ‘Register QuickBooks’ option from the ‘Help’ menu.
- And then, click the ‘Begin Registration’ option to start the process, and follow the instructions to complete it.
Other Recommended Articles:
How To Create Credit Memo Or Refund Check In QuickBooks Desktop For Windows
How to Fix Payroll Liability And Balance Sheet Report
How to Customize a Paycheck Layout or Pay Stub in QuickBooks Desktop
The End Line
So this was the blog, we hope, now you are able to upgrade QuickBooks Enterprise from QuickBooks Desktop Pro/Premier. Still, if you have any problem following the procedure to upgrade the QuickBooks Enterprise from QuickBooks Desktop Pro/Premier then, you can get our ProAdvisor support to solve your problem instantly.
